Mar 30, 2012

Gator Tour

I love the papers I chose for this layout! The blue wood grain looks like swirling water and the green polka dots could pass as crocodile skin.  It's almost like I planned it that way.  To be honest I didn't really.  I picked the blue wood grain because it looked like water but the green polka dot was pure coincidence.  I love it when that happens!


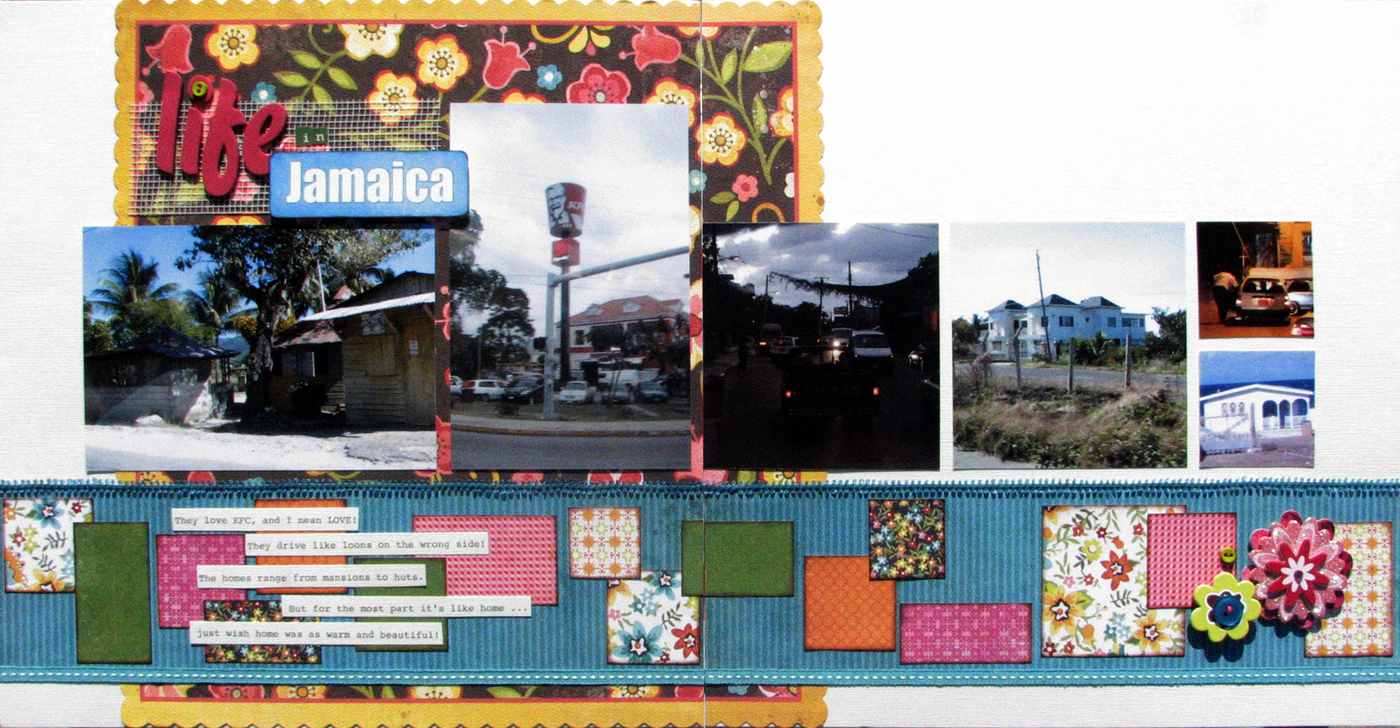
To add some fun to my layout I went a little bananas with buttons!  Aren't they fun looking?  Oh and that Yo-Yo flower was what I built this whole layout around!  It was just so cute, I couldn't resist it!


So, as a treat, and it something I haven't done in a long time, I created a small tutorial on how to create a Yo-Yo flower. They are so easy to do and before you know it you will be making them to go on everything. Think layouts, cards, hairbands and pins, broaches, on picture frames ... the possibilities are endless!


So without further ado, here's what you will need.  A piece of fabric (mine was 5.5" square), some embroidery thread (I found the thickness stood up better than regular thread), a needle, scissors, and buttons.  Take your fabric and fold it in half and then in half again.  Now fold it in half one last time.  It will look like a triangle.  Now holding the folded tip you want to round off the other end (in my pictures below you can see I am cutting off all the zig zag ends).  This should give you something that closely resembles a circle.  If it's not perfect, don't worry.  Thread your needle and tie a knot in the end with about two inches of excess after the knot.  You will need this length at the end.  Now stitch all the way around your circle.  try to keep all you stitches as even as possible and about a quarter inch in size and about an eighth of an inch from the edge.  Do not knot the end when you are done.  Now grab the two inch end from beginning and your end of the thread that still has the needle on it and hold them together between your thumb and forefinger.  Pull both pieces of thread bunching up the material as you go.  Once you get it as tight as you can you should have something that resembles the Yo-Yo flower. Tie your two ends in a secure knot.  Take the two inch end from the beginning and thread it up through the bottom of your button and take the needled end and thread it up the other hole of the button.  Using the needle end loop through the button and flower and couple of times securing the button the the flower.  When you are comfortable with it's stability (I did about three to four stitches), take your needle off of the thread and tie it in a bow with the two inch end from the beginning.  I have included some photos that should help all you visual learners out there!


I apologize but the one below does not have a bow on the top I just tied it underneath the flower but you a bow on the ones pictured before the instructions. And there you have it!  Sure hope you enjoyed this little tutorial!

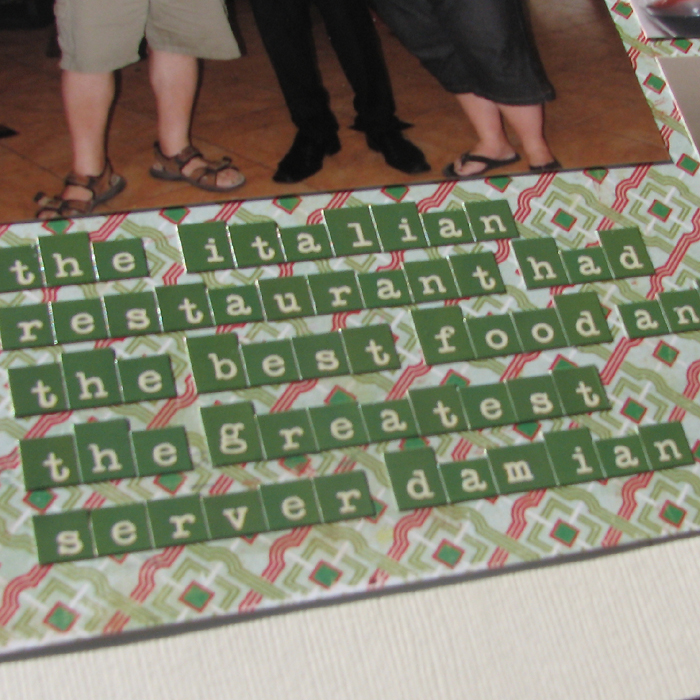
Supplies: Patterned Paper: My Minds Eye - Lime Twist Collection; Cardstock: Bazzills; Alphabet Stickers: Scenic Route - Alphas and Fancy Pants - Alphas; Embellishments: Buttons, Brads, Embroidery Thread, Journalling Card, and Fabric; Sketch: Sketches for Scrapbooking.

Mar 28, 2012

Beach Explorers


I saw these Post-It notes at Chapters and just had to have them! They make a perfect journalling spot don't they! And because they are a Post-It note, they come sticky back so no adhesive required!  They has different kinds so I might have to go back and pick up some more.


Supplies: Patterned Paper: ; Cardstock: Bazzills; Alphabet Stickers: American Crafts - Thickers and Basic Grey - Alphas; Embellishments: Post It Notes from Chapters and Prima Flowers; Sketch: Sketches for Scrapbooking.

Mar 27, 2012

Black River Tour

If you remember a couple of posts back, I mentioned my large stash of brads. They were my guilty purchase a couple of years back and now I have a jar full of them. While trying to fulfill my use the stash resolution, I have tried to find creative ways to use the brads and on this layout.


I think I did pretty good with thinking outside the box on this one. Instead of placing a couple on a line on my layout, I decided that a circle around my title would be a perfect way to use up a few of them!


Supplies: Patterned Paper: SEI; Cardstock: Bazzills; Alphabet Stickers: Basic Grey - Alphas and American Crafts Thickers; Embellishments: Brads, Me & My Big Ideas - Soft Spoken Stickers; Sketch: Sketches for Scrapbooking; Tools: EK Success - Scalloped Edger Punch.

Mar 23, 2012

Take Flight

Whoot! Whoot! Another layout created with scraps from my scrap pile and I will admit I am loving this one! I think one of the reason I love it so much is because I used the blue cardstock. Typically I use white, it's my go to choice, but this time I decided to switch it up a bit and I find that this color really seems to make everything pop!


I really like this grouping around my journaling spot.  There are so many fun little bits and pieces that I pulled out of my leftover embellishment pile.  Sometimes I forget what I throw in this pile and then when I rummage through it I find so many fun pieces.  It almost looks like it all came together from the manufacturer, doesn't it!


Supplies: Patterned Paper: Various Pieces From My Scrap Stash; Cardstock: Bazzills; Alphabet Stickers: Cosmo Cricket - Tiny Type and American Crafts Thickers; Embellishments: Basic Grey - Wander Journalling Spot and Various Bits and Pieces of Chipboard, Felt and Gummy Embellishments from my Leftover Pile; Sketch: Sketches for Scrpabooking - Volume 5.

Mar 20, 2012

Sunset Beach

Have you ever planned a layout and was so excited about the idea of it but then when you are work on it, it just doesn't seem to be working as you envisioned?  That was the case here!  It doesn't seem to have hit the mark of what I had in my head.  I can't put my finger on what it is that is off but something is.


One thing I know for sure is that my title is too close to the background paper, making it hard to see.  Normally I like my title to pop but this paper pack came with matching alphas which I decided to use.  You would think the manufacturer would make sure their alphas work better with their papers ... maybe it's just they didn't envision them being used on this polka dot background paper!  Unfortunately, once they were stuck down, I couldn't lift them off without distroying the background paper so I left them.


Supplies: Patterned Paper: Fancy Pants - Beach Bum Collection; Cardstock: Bazzills; Alphabet Stickers: Fancy Pants - Alphas; Embellishments: Fancy Pants - Beach Bum Die Cuts and Glitter Glue; Sketch: Scrapbook Generations - Monthly Kit.

Mar 19, 2012

Resort Life Is So Great


So I might have gone a little overboard with the flowers on this layout.  I am sure you know how that happens.  It starts with one and then it goes to two and before you know it you are trying to figure out how to get nine flowers on your layout!  It's funny!  I decided to layer a bunch of different flowers and buttons on top of one another to give them some dimension and depth.  I love how they turned out, even though it is a little over the top!


Supplies: Patterned Paper: My Minds Eye - Stella Rose Collection; Cardstock: Bazzills; Alphabet Stickers: American Crafts - Thickers, Memory Makers - Tiny Type, and Basic Grey - Alphas; Embellishments: Various Die Cut Flowers, Buttons, Jewels, Borders, and Glitter Glue; Sketch: Sketches for Scrapbooking - Volume 5.

Mar 16, 2012

Best Restaurant on the Resort

This was a very quick layout! Most of the photos I didn't have to crop and used them in 4x6 format.  I love layouts like this because it's quick to get the layout together and then I can spend time playing with my personal touches!  I love the title area on the left where I used the Dollie as my title block.  It works perfectly with the theme of this layout and my red background paper!


I decided to do my journalling with Cosmo Cricket Tiny Types.  At first I was excited about it but about half way I started to panic about running out of letters.  I kept going and I was lucky to have enough and I really liked how it turned out!


Supplies: Patterned Paper: My Minds Eye - Stella Rose Collection and Crate Paper - Peppermint Collection; Cardstock: Bazzills; Alphabet Stickers: American Crafts - Thickers and Cosmo Cricket - Tiny Type; Embellishments: Dollie, Buttons, Twine, Pink Paislee Fabric Flower, and SmashBox - Stickies; Sketch: Sketches for Scrapbooking - Volume 5; Tools: EK Success Edger Lace Punch.

Mar 14, 2012

Best of Friends

Whoop, whoop! Another layout created using scraps! Excluding the background paper, everything on this layout was made from my scrap pile. Hard to tell isn't it!


After I chose my scraps to make my blocks I noticed that two of the blocks (top right and bottom left) had only one colour in the pattern and for some reason that way throwing off my layout mojo.  So I decided to add another colour!  I took out some of my favourite acrylic stamps and some ink and stamped a pattern on to each of the blocks.  Almost looks like they came that way!  Now I am happy as it seems to go together better!  So if you ever find a piece of paper isn't working for or that a colour is missing from an otherwise perfect pattern why not give this a try!  You never know ... you might create something you love too!


Supplies: Patterned Paper: Basic Grey - Hello Luscious Collection; Embellishments: My Minds Eye - Abby Road Die Cut, Flowers, Rhinestones, Resin Flower, and Basic Grey - Hello Luscious Die Cut Stickers; Inks: ColorBox Chalk Inks ; Tools: Acrylic Stamps, EK Success Scalloped Edger Punch, and Tim Holtz - Tiny Attacher.

Mar 13, 2012

ATV Ride

When we went to Cuba a couple of years ago we did a Jeep Tour and I think it was our favourite excursion because it gave us the opportunity to explore the country side and see what life was like in Cuba. So when we saw our resort offered something similar except on ATVs we thought it would be fun. We left it a little disappointed. Don't get me wrong it was fun booting up a mountain side and to see the views but we missed not being able to go through a small village. There's so much you can learn about a place just by visiting a small village so that was a little disappointing that we didn't do it. Also, in Cuba it was an all day trip through a couple of towns and villages where as this one was only 45 minutes. But like I said we still had fun playing on these little ATVs and take the path less beaten to the top of a coffee producing mountain. The funny thing is the one in Jamaica cost twice as much as the one in Cuba!


I wanted to add more dimension to the Speed Limit and You Are Here die cuts so I covered the inner circle on each with Glossy Accents which gave them an epoxy look.  Also instead of checking the adventure category on the journalling spot I used a brad.  I have so many brads in my collection that I decided I need to start finding creative uses for them.


Supplies: Patterned Paper: My Minds Eye - Good Day Sunshine Collection; Cardstock: Bazzills; Alphabet Stickers: American Crafts - Thickers; Embellishments: Basic Grey - Wanderer Die Cuts and Layered Flowers, My Minds Eye - Good Day Sunshine Die Cuts, Brads, Buttons, Floss and Bazzills PreCut Border Strips; Ink: ColorBox Chalk Ink; Sketch: Sketches for Scrapbooking Volume 7; Tools: Creative Memories - Corner Rounder.

Mar 12, 2012

Life In Jamaica

I love the colours in this layout! Bright and cheery just like my memories! The best thing about this layout is that other than the background die cut sheet and the white cardstock that the layout is based on everything else uses a 6x6 paper pad. Seems like such a better way than cutting up a whole 12x12 sheet to achieve the same affect.


The top ribbon was not the right colour so I pulled out my ink pads and went to town on creating the colour I wanted. Once I got it, I took my heat gun to it to set it. Fun thing then happened, the ribbon shrank right up. It was cool really and I liked how it worked so I went with it. I guess that is what the creative process is all about ... right?


Supplies: Patterned Paper: Crate Paper - Farmhouse 6x6 Pad and My Mind's Eye - Bloom and Grow Die Cut Paper; Cardstock: Bazzills; Alphabet Stickers: American Crafts - Thickers; Embellishments: Buttons, Ribbon, Drywall Tape, and Chipboard Flowers from my stash; Inks: Colorbox Chalk Inks; Sketch: Sketches for Scrapbooking Volume 7.

Mar 8, 2012

Giving It a Try

I have tried quilting before but I was basically winging it with advice from other quilters but without the basic knowledge and understanding. Don't get me wrong, most of the time things turned out passable but if anyone who knew anything about quilting or sewing for that matter took a look at my quilt, they would see I have no idea what I am doing. 

A dear friend of mine asked me if I would take a quilting class with her and seeing as my hubby bought me a brand new sewing machine for Christmas which I was dying to use I jumped at the chance!  We had out first class last Saturday and for the last couple of days I have been working on my homework.  Who knew quilting was such a precise craft?!  For someone who has never been that good at measuring and who always says that's close enough this has definitely been a challenge!  My seam ripper and I have become good friends!  I am definitely looking forward to next several classes as I have two other quilt projects that have been started but never finished as I got to a point where I did not know how to move forward.  Check back at the end of the month when I will hopefully have a completed quilt to show you!


Supplies: Riley Blake - Sugar and Spice Fabric.

Mar 2, 2012

Rum Tour

As part of the YS tour, you got to visit the Appleton Rum Estate. Now neither Steve nor I are huge rum drinkers but for someone who is they would probably think they had died and gone to heaven here. You were free to sample as much of different kinds of rums they make. Who knew there were so many different kinds! So because this layout was kind of about alcohol I thought the Social Club collection from Cosmo Cricket would be a perfect match. Good thing I hoarded it for all this time!


So the Social Club sticker sheet has these cute little journalling spots but I had such a hard time with them because they had a glossy finish (like most stickers have) which made my marker pool and smudge.  for someone who is particular about things being consistent this drove me nuts.  I used my usual Zig pen for the journalling but I am wondering if there is something better out there for this type of material?  I thought about using my Copic marker but the tips are too big for fine writing.  Have you run into this problem and if so how do you get around it?


Supplies: Patterned Paper: Cosmo Cricket - Social Club Collection; Alphabet Stickers: American Crafts - Thickers; Embellishments: Drywall Tape, Cosmo Cricket - Social Club Element Stickers, and Chipboard Arrows; Sketch: Sketches for Scrapbooking Volume 1.

Mar 1, 2012

YS

I love this layout! It probably has to do with the fact that I love the large photo. Going to YS falls was the thing I was looking forward to the most in Jamaica (I love waterfalls) and let me tell you, I was so disappointed when I ended up getting sick and couldn't go. Thank goodness everyone in the group knows me so well and took tons of photos for me. I feel bad scrapbooking it because I didn't go but the rest of my family did. Do you ever do that? Scrapbook events you weren't there for?  At least my journalling explains me not being there.


When I planned this layout I knew I wanted to use these huge orange chipboard letters I had in my stash but when it came time to dig through them to find my letters I found out I had no more Ys. I was disappointed to say the least. Yes I could of tried to fudge a Y but I didn't have what I needed for that either.  I tried other alphas from my stash (and trust me I have quite a few) but none of them worked.  I think because I had my heart set on the orange ones. Then it dawned on me, why not use the negative of the orange ones? Eureka! I was happy again! I put a piece of patterned paper underneath them to make them pop on the layout and then stuck them down. So glad I thought of that or every time I would have looked at this layout I would of been disappointed in not using my orange letters!


Supplies: Patterned Paper: My Mind's Eye - Stella Rose Collection, Crate Paper - Random 6x6 Paper Pad, and Crate Paper - Farmhouse 6x6 Paper Pad; Alphabet Stickers: Orange Chipboard Letters; Embellishments: Ribbon, Crochet Flower, Bling Flowers, Webster Pages Acryllic Flowers, My Mind's Eye - Breaking Free Die Cut, and Authentique - Blissful Die Cuts; Inks: Colorbox Chalk Ink.