Aug 16, 2012

Group Snapshot

Awhile back I won a stamp set from Swiss Girl Designs. She has some of the cutest stamp sets! In fact, when Rahel told me I had won a set I took the opportunity to purchase a couple more to be sent with my winning set. This was my first layout I did with my new stamps and I love them. If you are interested in her sets visit her site at http://swissgirldesigns.com/.  If you have time while you are there, look through her blog, she is so inspiring and she even does some really awesome how to videos set to her hubby's music!


I also stepped it up a bit and did a little bit of fussy cutting.  I really liked the flowery background paper in this collection but I found it really over powering.  So I cut out a small section, as well as a couple of butterflies, and then tucked it behind then placed it so that it looked like it was peaking out from behind the photos.

Supplies: Patterned Paper: American Crafts - Margarita Collection; Alphabet Stickers: Old Chipboard Letters; Embellishments: Margarita Stickers, Swiss Girl Design Stamps; Inks: Colorbox; Tools: .

Aug 15, 2012

We Jamexican

The next several layouts you will see from me are from our second trip to Jamaica. This time around was way better cause both Steve and I managed to not get sick! It was a fantastic trip and because we had already been to Jamaica the year before, we didn't have the need to cram all kinds of sightseeing into this trip. It was way more relaxing!

We stayed at the same resort as we did the last time because it was a nice resort and we loved being able to spend time at the sister resort down the road. They had the best Mexican restaurant at the sister resort! I think we went 3 times this trip. We joked about it being not just Mexican food but Mexican food with Jamaican flair thrown in here and there so we called it Jamexican. And that is where the title we this layout came from.


This layout was so much fun!  I managed to use the left over bits after cutting out the large circle to cut out little circles to place around the rest of my layout.  Some of them were even popped up with foam dots for dimension.  And then came the heart.  I really wanted the heart to stand out but the pink felt heart I was using just seemed lost.  So I mounted it on blue cardstock but it still seemed lost.  So I broke out the washi tape and made a fun and easy ruffle.  There now it popped!  I repeated the ruffle in the middle of the layout to add some balance and more dimension and using the washi tape sure made it easy.  If you have never done it, it's simple really!  I started by tucking one end under picture and then loop up and stick down to the cardstock.  Don't be concerned about keeping everything straight and even, it looks better if it isn't.  In fact, I wanted mine to look wavy so I deliberately made it more so.  Be careful not to let you loops stick together and keep going all the way to the end where you can cut it any way you like - I did pennant style. Now go back and push all your loops down.  Tada!

Supplies: Patterned Paper: American Crafts - Magarita Collection; Cardstock: Bazills; Alphabet Stickers: American Crafts Thickers; Embellishments: Felt, Washi Tape, Glass Beads, Embroidery Thread, and Chipboard Elements; Sketch: Sketches for Scrapbooking.

Jul 30, 2012

Oh So Sleepy

My dog makes me laugh!  But then I think most dogs are amusing to their owners otherwise why would we keep them! I really think Angus thinks he human.  What ever Steve and I are doing he wants to be part of it. Sitting on the couch ... he has to wedge himself between us.  Driving in the car ... he stand on the arm rest between us. Sleeping in bed ... he sprawls out between us.  It's so funny!  But what's even funnier (and what this layout is about) is that when you get up in the morning (or the middle of the night for that matter) he's quick to just in your spot.  Every single time!  And have you ever tried to move a sleeping dog?  It's next to impossible! He only weighs about 18 lbs but when he's sleeping I struggle, and I mean struggle, to move him!  It's such a rough life he has!  Good thing we love him so!


In keeping with the circles from the background paper I made sure my journalling spot was round too.  I then added some black doodling to it to make it pop.  I continued the round theme with the button and the round camera die cut.  Sometimes things just come together so easily!


Supplies: Patterned Paper: Unknown; Alphabet Stickers: American Crafts Thickers and Scenic Route Die Cut Letters; Embellishments: Washi Tape, Journalling Spot, Button, and Cosmo Cricket Joyride Sticker.

Jul 26, 2012

And the Thunder Rolls

Every once in awhile you find a piece of patterned paper that does all the work for you. This background paper went perfectly with my photo. So I created a couple of mats for my photo and then using my exacto knife I cut a bit of the umbrella out of the background paper to slide the mat under so as not to loose any of the umbrella and then added my title and journalling and I was done! Might of been record time for me too - 10 minutes to assemble!


Supplies: Patterned Paper: Unknown; Cardstock: Bazzills; Alphabet Stickers: American Crafts Thickers, Basic Grey Alphs, and Making Memories Tiny Types; Tools: EK Success Edger Border Punch.

Jul 23, 2012

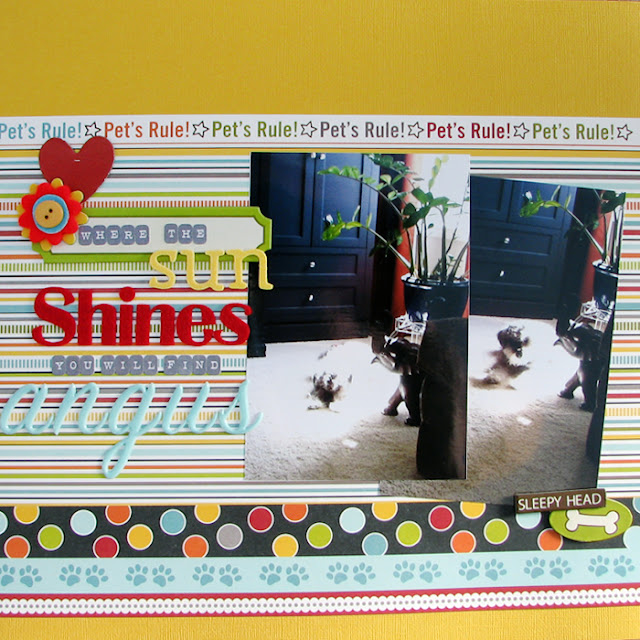
Where the Sun Shines ...

I think one of my favorite parts of scrapbooking has to be title construction. I'm not sure why? I just really like it. I think it might be because I have an issue with doing a title in all one font and colour. It needs to be more eclectic than that for me. I get to pull out my stacks (and I mean stacks) of Thickers and Letter Stickers and then play around with colour and size combinations. Of course there is always the challenge of finding all the letters you need to spell a word which can be a little frustrating but for the most part it is enjoyable. So on this layout I really like how my title takes up the while left side. Makes a really big impact if you ask me. Plus I got to use four different types of alpha fonts!


I kept the smaller text all one colour and type just to keep it consistent and allow the bigger accent words to stand out!


Supplies: Patterned Paper: Bella Blvd - Tail Waggers and Cat Naps; Cardstock: Bazzills; Alphabet Stickers: American Crafts Thickers, Making Memories Alphas, and My Minds Eye Tiny Types; Embellishments: Bella Blvd - Tail Waggers and Cat Naps Chipboard and Basic Grey Flowers.